
Integration
The minimal iOS deployment target version is 11.
The programming language is Swift.
Before you startMake sure you've obtained a token, server URL, and auth key from credolab
1. Declare dependencies
See this page for details on installing CocoaPods and creating your first pod file if you haven't already.
Now, modify your pod file
source 'https://token:[email protected]/basic/credolab/proxyen-sdk/cocoapods/index.git'
target 'YourApplication' do
  pod 'CredoAppCore', '~> X.Y.Z'
  pod 'CredoAppBehavioral', '~> X.Y.Z'
  pod 'CredoAppCalendarEvents', '~> X.Y.Z'
  pod 'CredoAppCalendarReminders', '~> X.Y.Z'
  pod 'CredoAppContacts', '~> X.Y.Z'
  pod 'CredoAppMusic', '~> X.Y.Z'
  pod 'CredoAppMedia', '~> X.Y.Z'
  pod 'CredoAppIovation', '~> X.Y.Z'
  pod 'FraudForce', '~> X.Y.Z'
  # Optional: if you want to use logging plugin
  pod 'CredoAppLogging', '~> X.Y.Z'
  pod 'Sentry', :git => 'https://github.com/getsentry/sentry-cocoa.git', :tag => '7.23.0'
End
NotePlease, replace X.Y.Z with module versions from SDK Versions page.
The final result should look like this:pod 'CredoAppModule', '~> 1.0.0'
Once added, the cocoa pods tool will download the dependency to the Pods directory in your project and update the Podfile.lock after running the following command:
pod install2. Declare permissions
Please declare permissions according to the "permissions" in Modules section
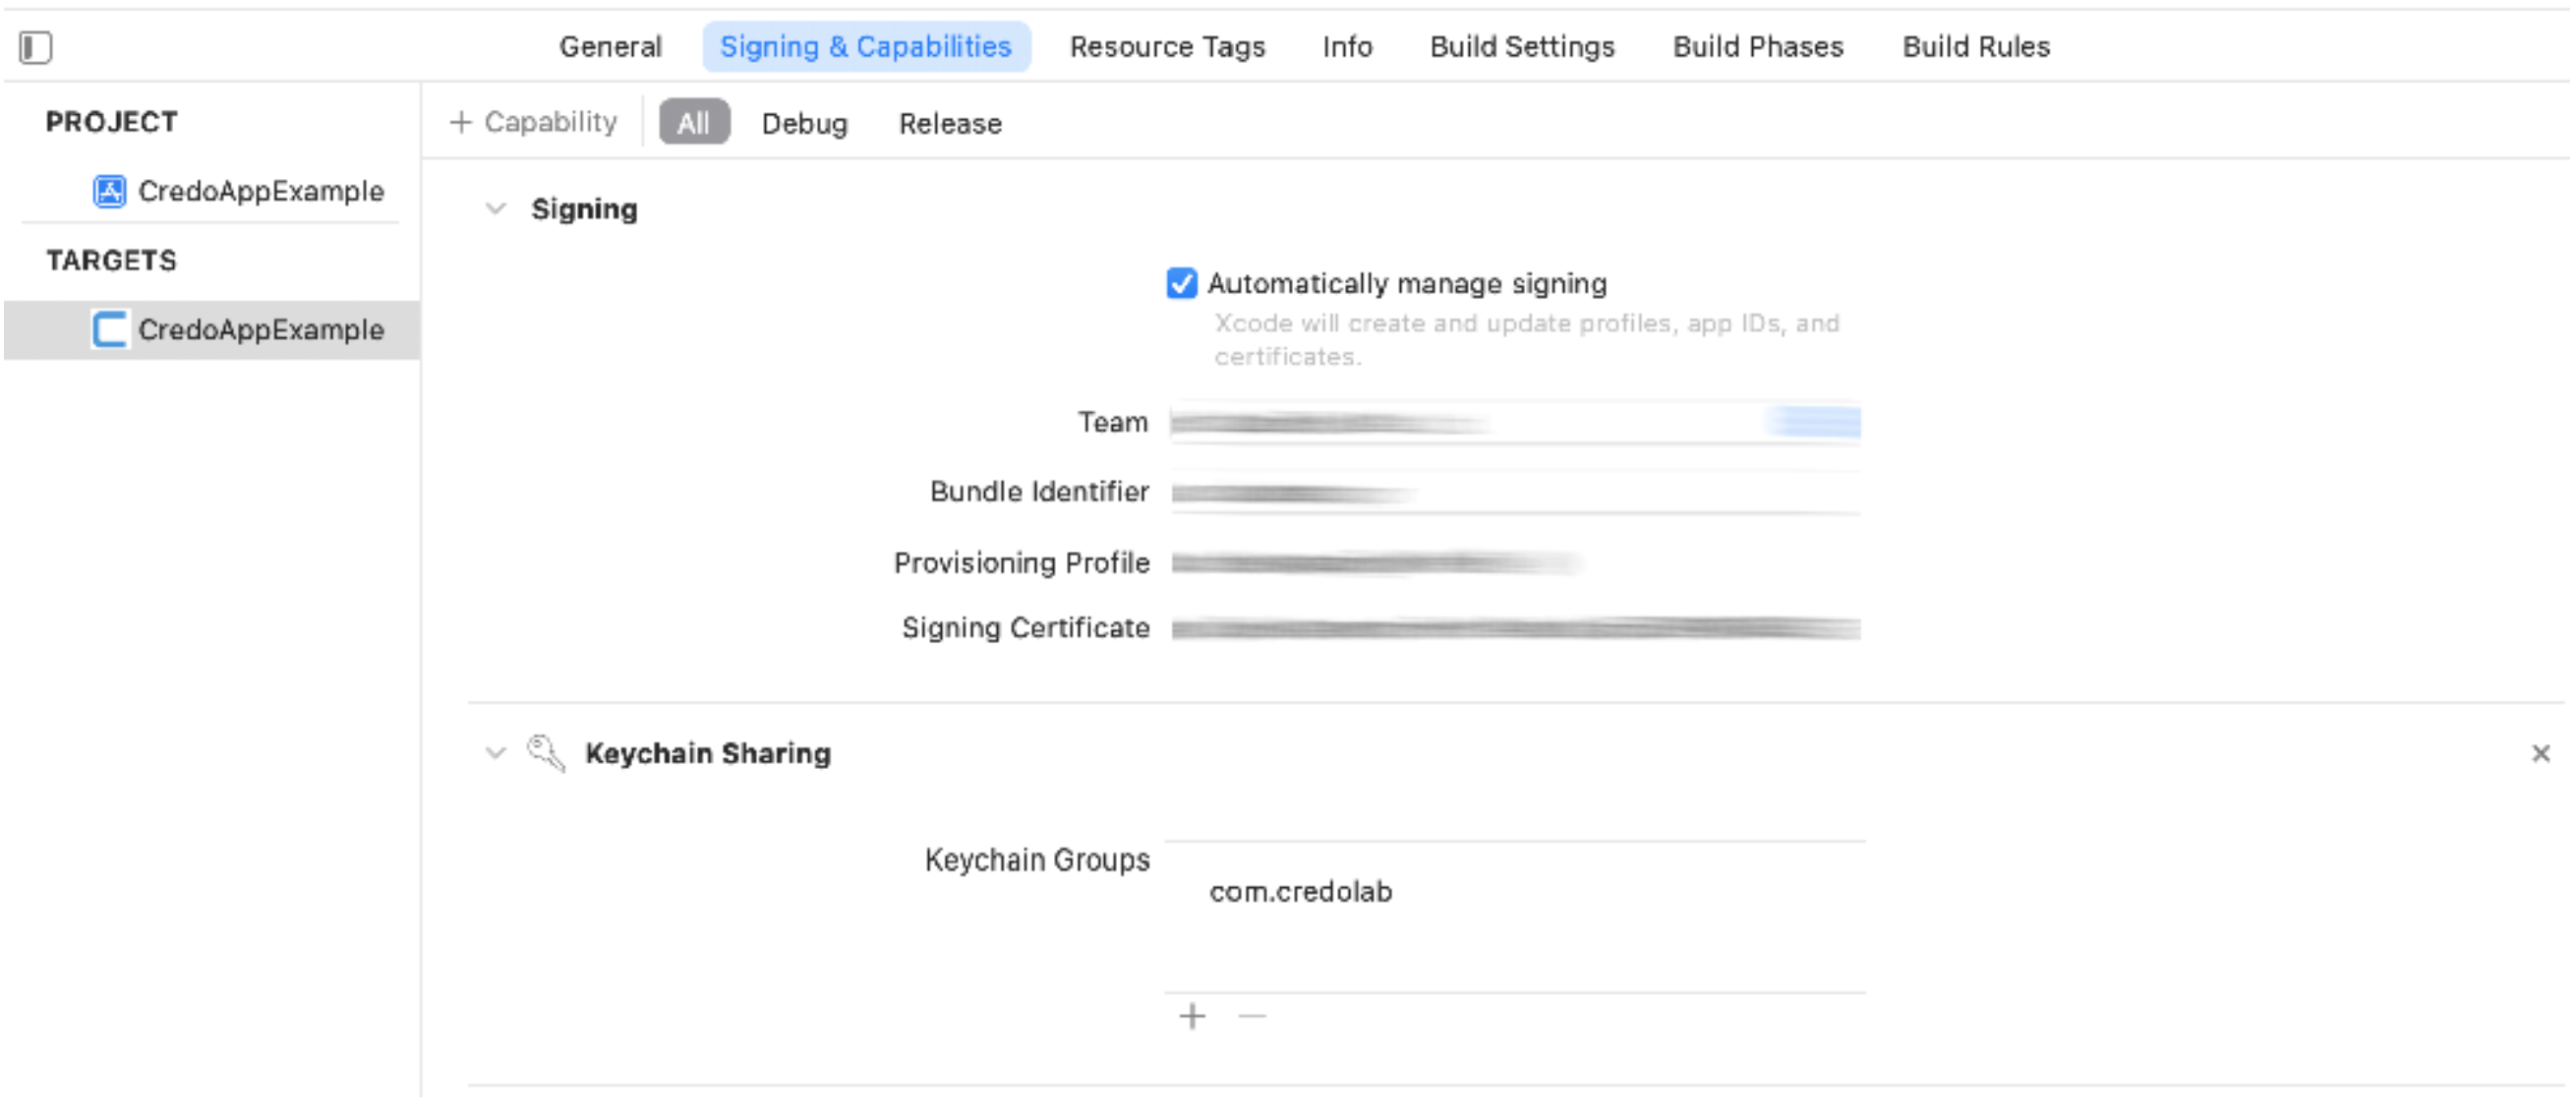
Enable "Keychain Sharing"
To enable sharing Device ID across your apps, enable the "Keychain Sharing" option and configure the app:
- Add
com.credolabto its list of Keychain Groups:
- Check that added value is reflected in the entitlements file:
$(AppIdentifierPrefix)com.credolab
- Add the key
AppIdentifierPrefixwith the string value$(AppIdentifierPrefix)to your app'sInfo.plist
3. Build and use CredoAppService
To start, you need to add the following snippet to your code
// if you use BehavioralModule
// credolab recommends to use logging in behavioral module
BehavioralModule.setLogger(plugin: LoggingPlugin())
// run can tracking in any place in your code
BehavioralModule.startTracking()

let credoAppService = CredoAppService.Builder()
    .addModule(BehavioralModule())
    .addModule(CalendarEventsModule())
    .addModule(CalendarRemindersModule())
    .addModule(ContactsModule())
    .addModule(IovationModule())
    .addModule(MediaModule())
    .addModule(MusicModule())
    .addPlugin(LoggingPlugin())
    .build()

// stop tracking on a particular screen or app condition
BehavioralModule.stopTracking()
Now, use the service
	let credoAppResult = credoAppService.collect()

	switch credoAppResult {
		case .success(let value):
			log(value)

		case .error(let errorCode, let errorMsg):
			log("Err: \(Date().timeIntervalSince1970); code - \(errorCode); msg - \(errorMsg);")
	}
NoteRemember that you always must call
collectmethod on a background thread.If
collectmethod is successful then dataset is returned.
Next Steps
After successfully integrating our SDK, it is recommended to proceed with the following steps to utilise our platform effectively:
- Setting up your Reverse Proxy
- Uploading your Dataset. Once the server is configured, you can upload your dataset using the server address.
- Collecting your Dataset Insight. With the dataset uploaded, you can now get insights.
Upload from an iOS Device
If you are interested in uploading datasets directly from the iOS device to our servers, we invite you to explore the following code snippets. These examples can provide valuable guidance and assistance in implementing the upload functionality.
If you have any further questions, please do not hesitate to contact us.
Updated 6 months ago